Discovering Gatsby.js. How and why this blog was built.

Why would I need a blog?
The idea of creating a blog did not come from a sudden thought, it was rather accumulating and gaining traction over the course of last two years. The initial reason behind it was my English. Here is an interesting fact: although Russian is my native language, it is much easier for me to express complex thoughts in English, but it comes with a catch - it takes an enormous time for me to write them down in a cohesive academic manner. That is why I do not like writing classes. So, I thought that opening a blog would encourage me to write more and ultimately erase my writing barrier.
Another reason why I wanted to open a blog was because I really liked the idea of sharing insights and personal experiences with other people. Yes, I could do it through already available mediums such as Instagram or Twitter, but lately I have been finding these social media platforms rather toxic. Opening my own website-based blog would free me from the pressure of getting enough likes and views. Validation independence would make it truly authentic. Of course, the more people I share my ideas with, the better but that is not my main priority right now. I always wanted to independently work on something personal, perfecting every detail of it. Well, here we are.
How it was built?
The initial plan was to build a typical MERN stack application. I proceeded coding with React until I stumbled upon Gatsby.js. I remember a friend of mine showed me what Gatsby.js is, but I never took the opportunity to learn it. From the first glance, Gatsby.js looked like a very promising framework that could possibly be popular in the future. It was offering better efficiency by pre-building static pages out of your React application. Plus, the process of converting your React application into Gatsby seemed to be very smooth and easy with minimal structure alteration.
Once I was familiar with Gatsby's documentation, I have started building my blog on top of an existing template that they were offering on their website. You can actually try it yourself by running these scripts below:
npm install --save gatsby
gatsby new gatsby-starter-delog https://github.com/W3Layouts/gatsby-starter-delog
Design Improvements
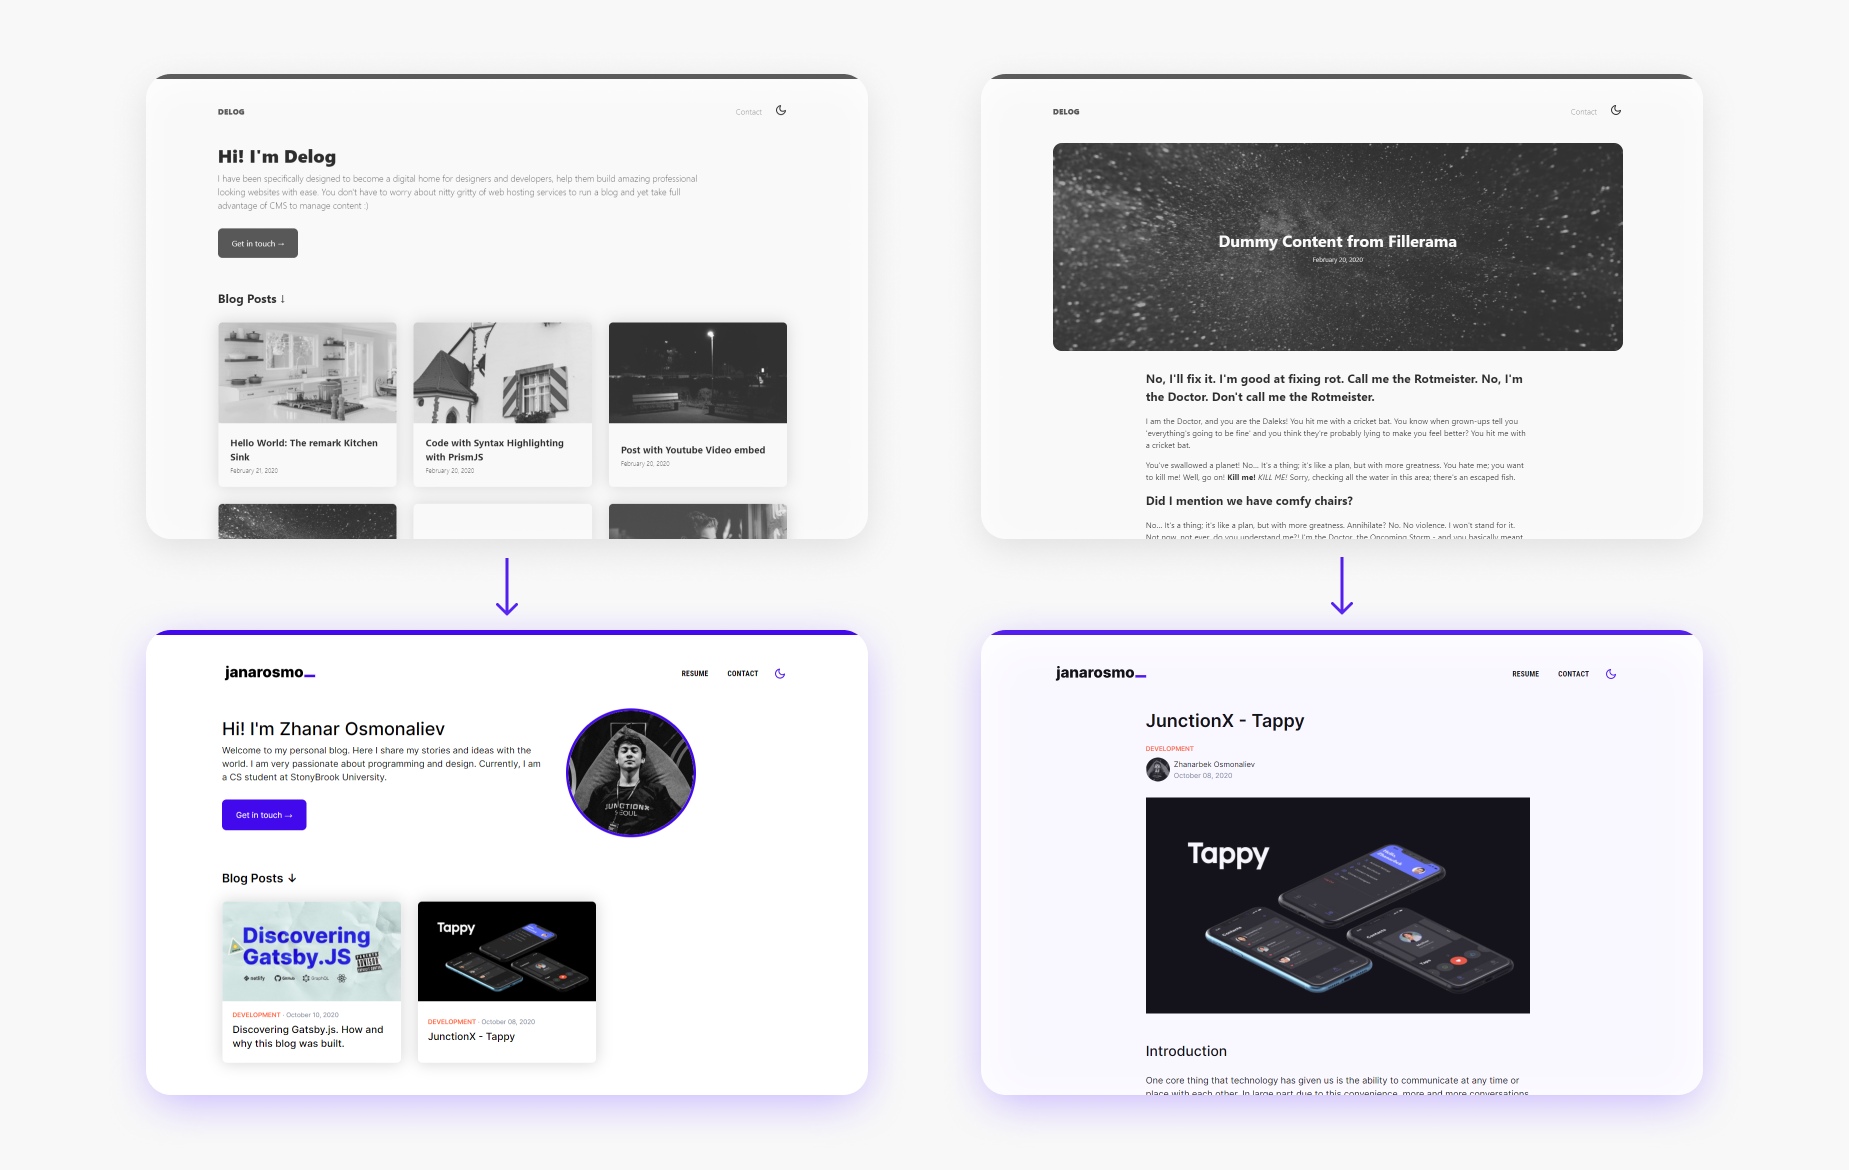
The default template was looking pretty good, however, it was plain. I especially did not like the typography spacing: margins between different text sizes were the same, which was kind of odd for a text-rich website. Instead, I used 24px spacing baseline that I successfully tested on a website I did for a start-up this summer. The idea is pretty simple: spacing increases incrementally depending on the element hierarchy, giving my text a consistent look and better readability.
--baseline: 24px;
--space-sm: calc(var(--baseline) / 2);
--space-md: var(--baseline);
--space-lg: calc(var(--baseline) * 2);
--space-xl: calc(var(--baseline) * 3);
I also added my own touch to the overall design of the website. I tried to use Material UI React along the way, as I was getting more confident with it. Additionally, I changed the GraphQL schema to include a flair (e.g. development, personal, academic, etc.) of the post for better visual navigation.

Deployment
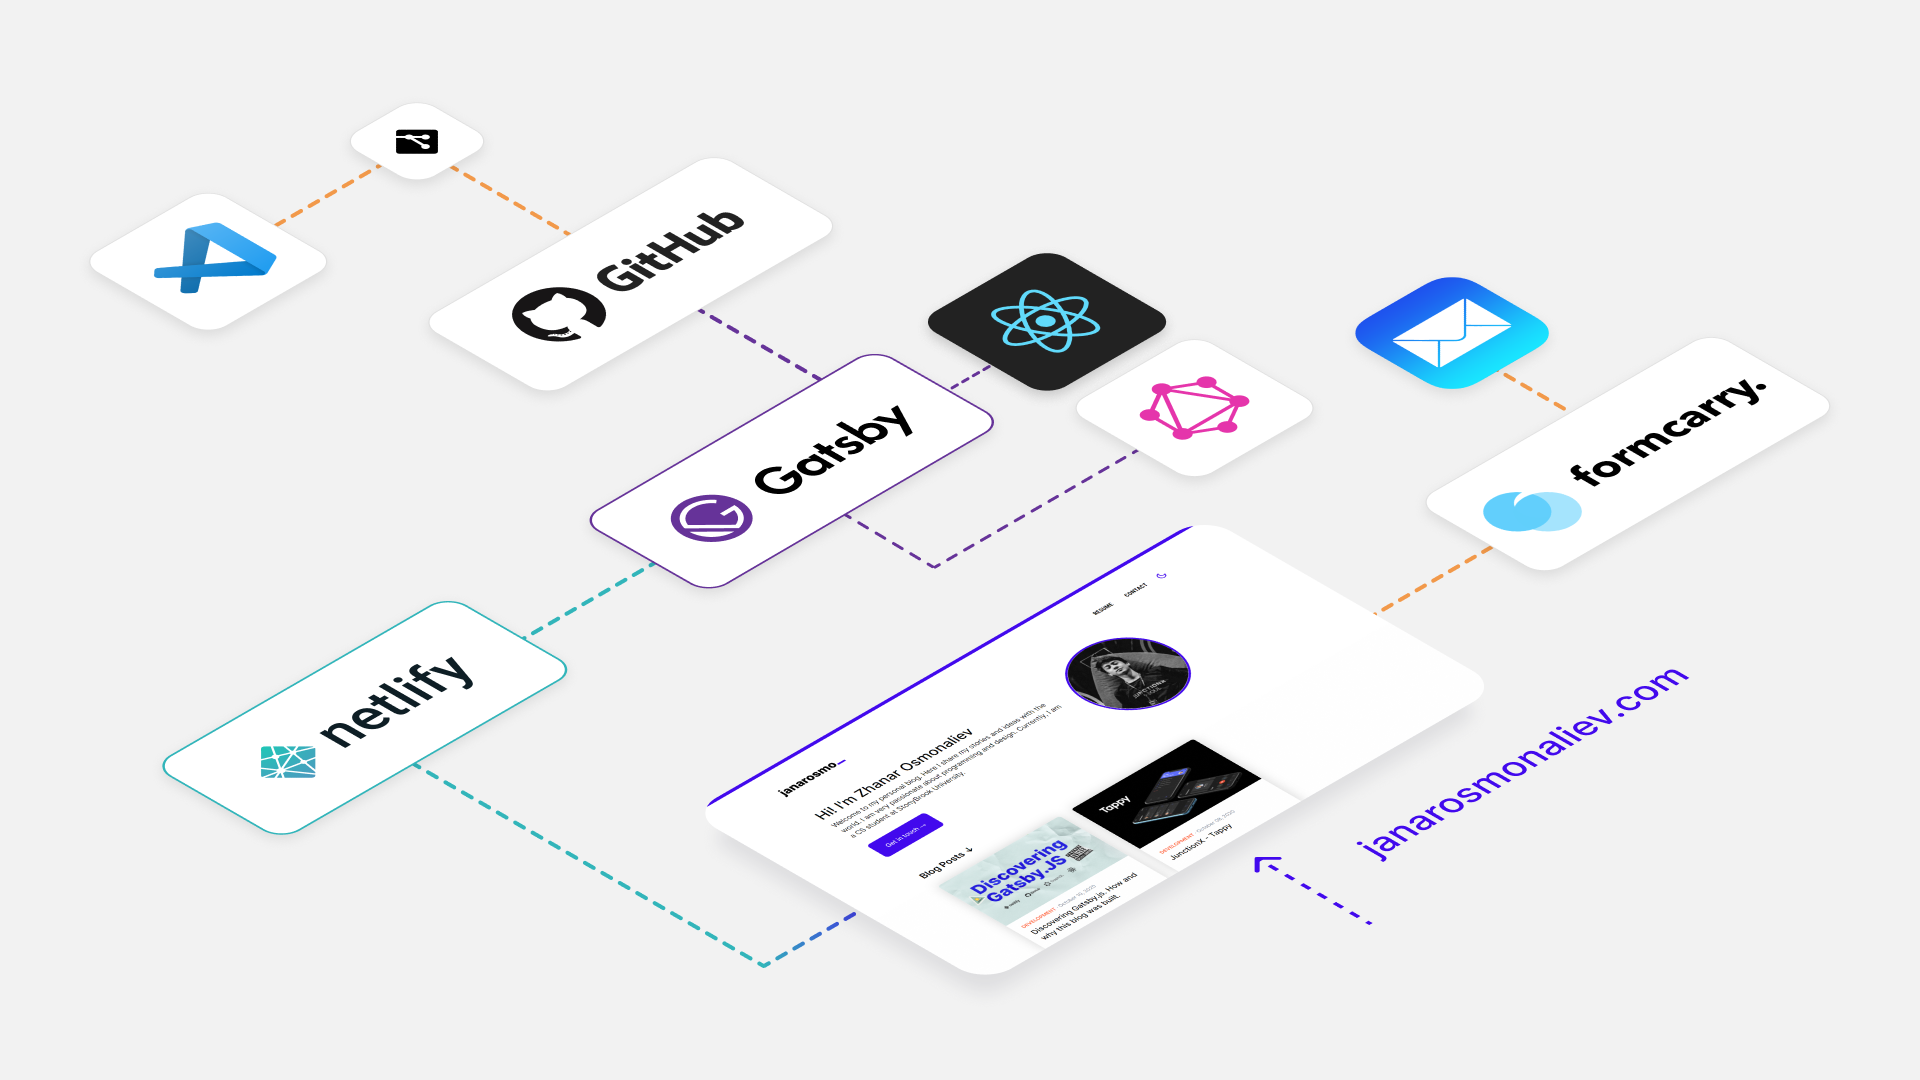
After some more coding and small design improvements, I have deployed my application to Netlify through GitHub. On code changes, Netlify automatically fetches the new code and deploys a new build, a practice which is known as continuous integration. Speaking of my contact form, the data is sent using fetch API to my Formcarry endpoint, which informs me later through email. As an experiment, I have installed an ImgBot to my repository, that will automatically optimize all of my uploaded images and make a pull request once it is done each time.

To make things easier, here is a structure of my blog that is portrayed in the highest level of abstraction possible, while retaining the overall logic.
By the way, if you are a student, you can get a discount on a domain name just like I did on Namecheap.com using GitHub Student Developer Pack.